How to Design a Folded Brochure?
Download Folded Brochure templates in all available sizes in AI and PDF formats via the link. With the help of the templates, you can prepare the file for print in your Adobe Illustrator simply and easily. While preparing your file for print, you’ll have to exclude the bleeds layer. Follow these simple steps to design and prepare your Folded Brochure for print:
- Choose Folded Brochure type
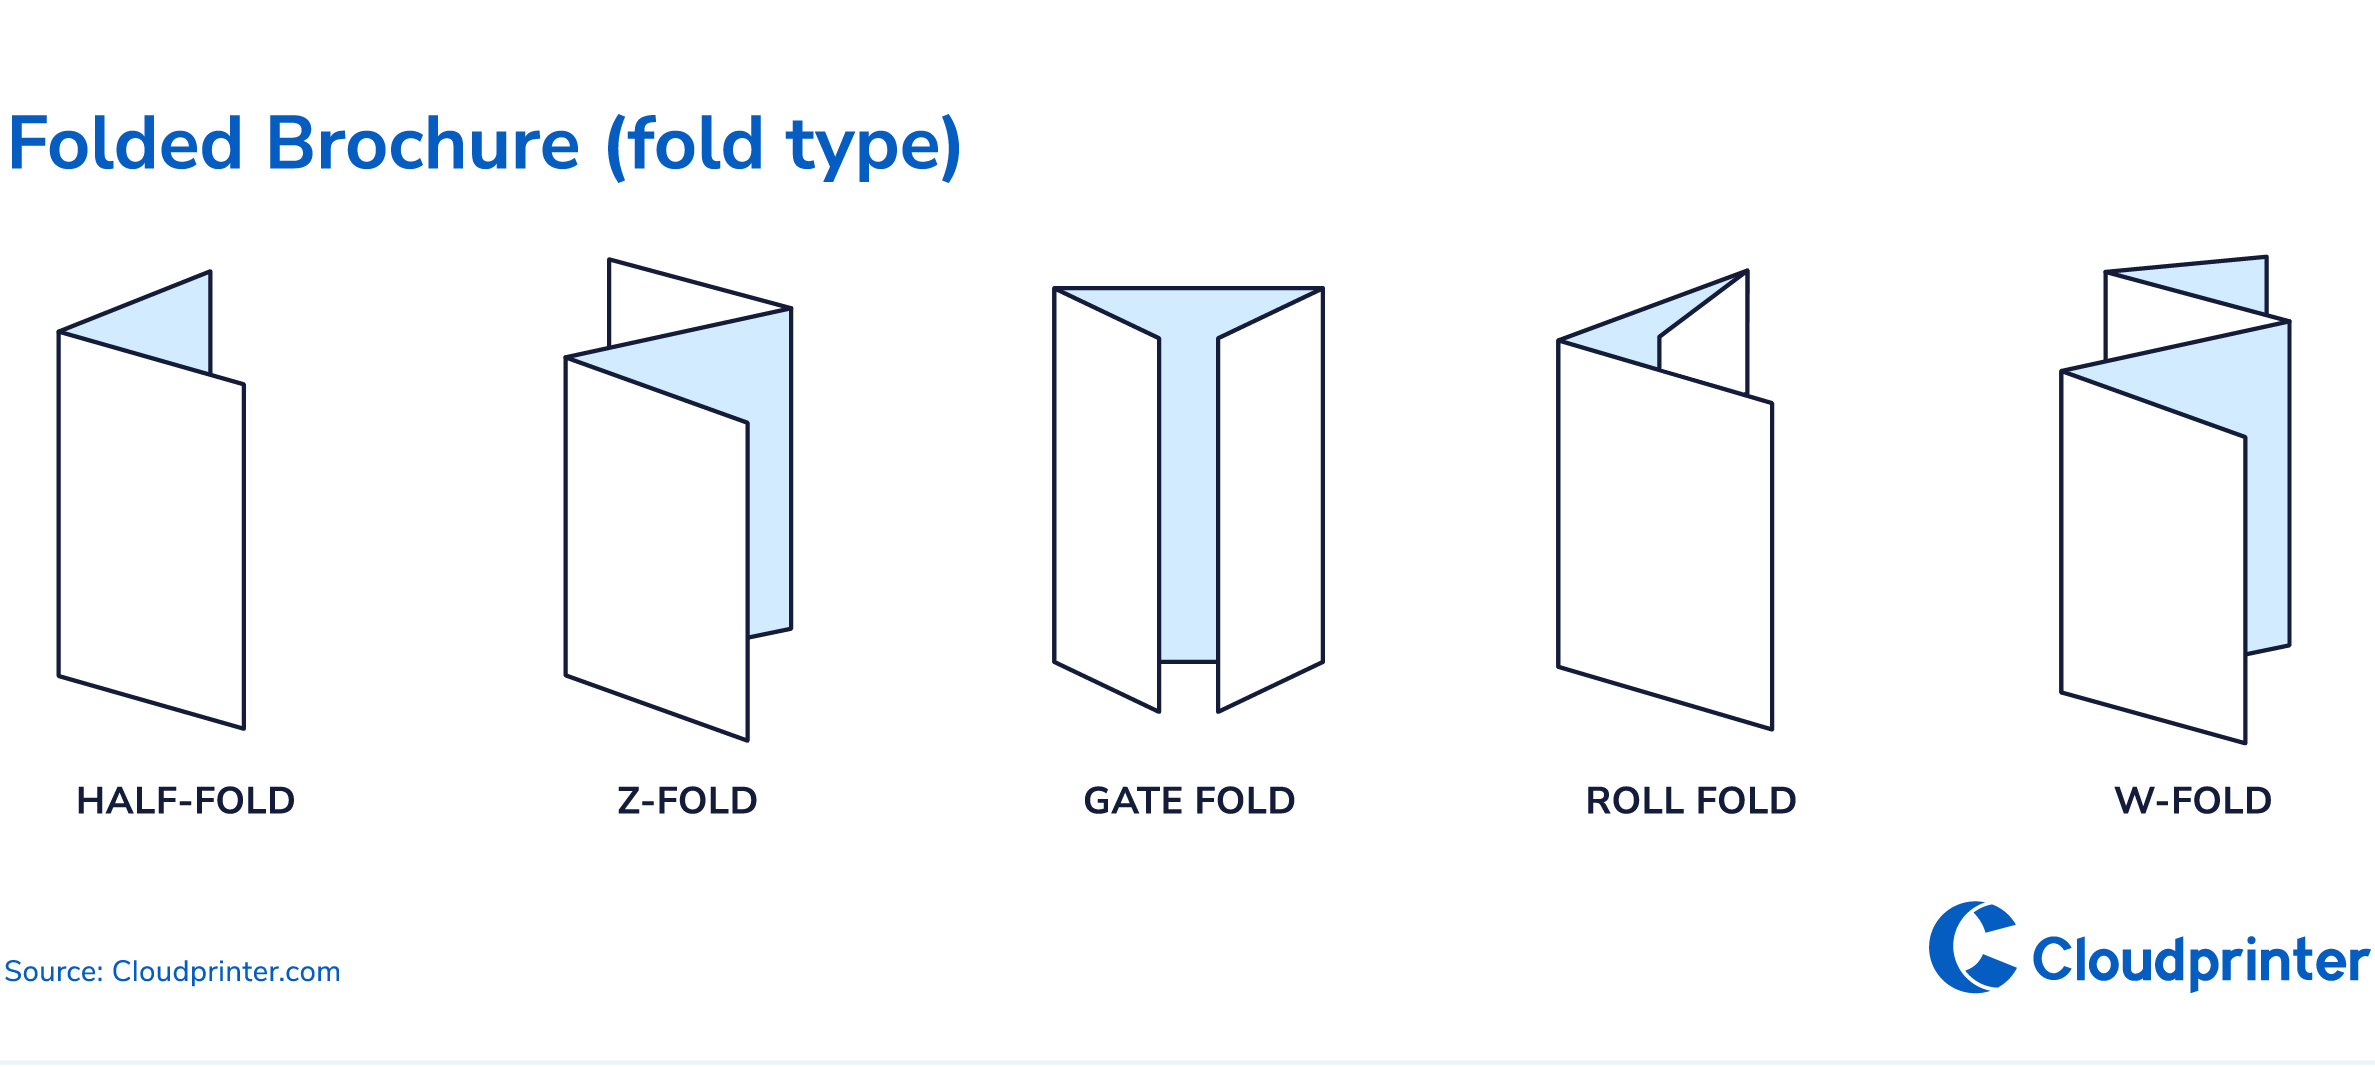
Among Folded Brochures at Cloudprinter.com the available types are Half-fold, Z-fold, Gate fold, Roll fold and W-fold.
Half-fold
This type of fold is also referred to as a single fold — you simply fold the sheet one time and end up with a half-fold leaflet.
Z-fold
This type of fold has 6 pages that are of the same size. Z-fold looks like a zig-zag, which is another name for this type of fold.
Gate fold
This type of fold has 2 folds that form left and right-hand pages of the same size that meet right in the middle when folded.
Roll fold
The main specific feature of this type of fold is that with each fold, each page is folded in on itself. Independently of the number of pages, you simply continue folding pages inwards.
W-fold
This type of fold is similar to the Z-fold, the only difference — it has 2 more pages.
- Choose Folded Brochure size
To design and prepare your Folded Brochure for print with Cloudprinter.com, choose one of the available sizes. Keep in mind that both rectangular and square Folded Brochures are available. The rectangular Folded Brochures are available both in portrait and landscape orientation.
- Set Folded Brochure bleeds
The next step is setting the bleed areas at each side of your Folded Brochure to make sure all important information is kept safe. For this, simply add 3 mm (0.125 in) at each side of the Folded Brochure. Make sure your information is within the bleed limits; colors, background images and the layout of your Folded Brochure design extend to the bleeds area as well, so that there are no white edges after cutting your Folded Brochure. We also recommend avoiding placing text or important information inside of the safe zone — the 3 mm (0.125 in) inside of the cutting edge in order not to be clipped when cutting your Folded Brochure. This way, you won't lose any data while you design your Folded Brochure.
Prepare Folded Brochure file for printing - Set 300 DPI** resolution;
Choose CMYK or RGB colour model;
Save the file in PDF/X-4.
Well done! Now you can print your Folded Brochure all over the world as close to the delivery destination as possible.
Folded Brochures are printed on different types of paper, here is a useful link how to save a PDF file for printing on paper:
