How to Design a Magazine?
Download Magazine templates in all available sizes in AI and PDF formats via the link. With the help of the templates, you can prepare the file for print in your Adobe Illustrator simply and easily.
While preparing your file for print, you’ll have to exclude the bleeds layer. Follow these simple steps to design and prepare your Magazine for print:
Choose Magazine size and type Select one of the available sizes at Cloudprinter.com to design and prepare for printing your Magazine. Choose which fits you best — landscape, portrait, or square page orientation. There are 2 types of Magazines available — Saddle-Stitched and Perfect Bound Magazine. Mind the number of pages Keep in mind that the number of pages in a Saddle-Stitched Magazine should be a multiple of 4 and in a Perfect Bound Magazine — a multiple of 2.
Cover and pageblock requirements For the Saddle-Stitched Magazine, the print file must include the Magazine cover and the Magazine page block as one file (each page should be designed separately in the order you want to read your Magazine e.g. 1-16). In case you need to have 16 pages Magazine, the print pdf file must include 20 pages — 16 pages for the page block and 4 pages for the cover:
- Page 1 - cover’s front 1st page with the cover’s image;
- Page 2 - front cover's 2nd page may or may not be printed;
- Page 3 - the page blocks 1st page with the required printed information;
- Page 18 - the page blocks the 16th page (the last) with the required printed information;
- Page 19 - back cover’s 3rd page may or may not be printed;
- Page 20 - the cover’s back 4th page with the cover’s image.
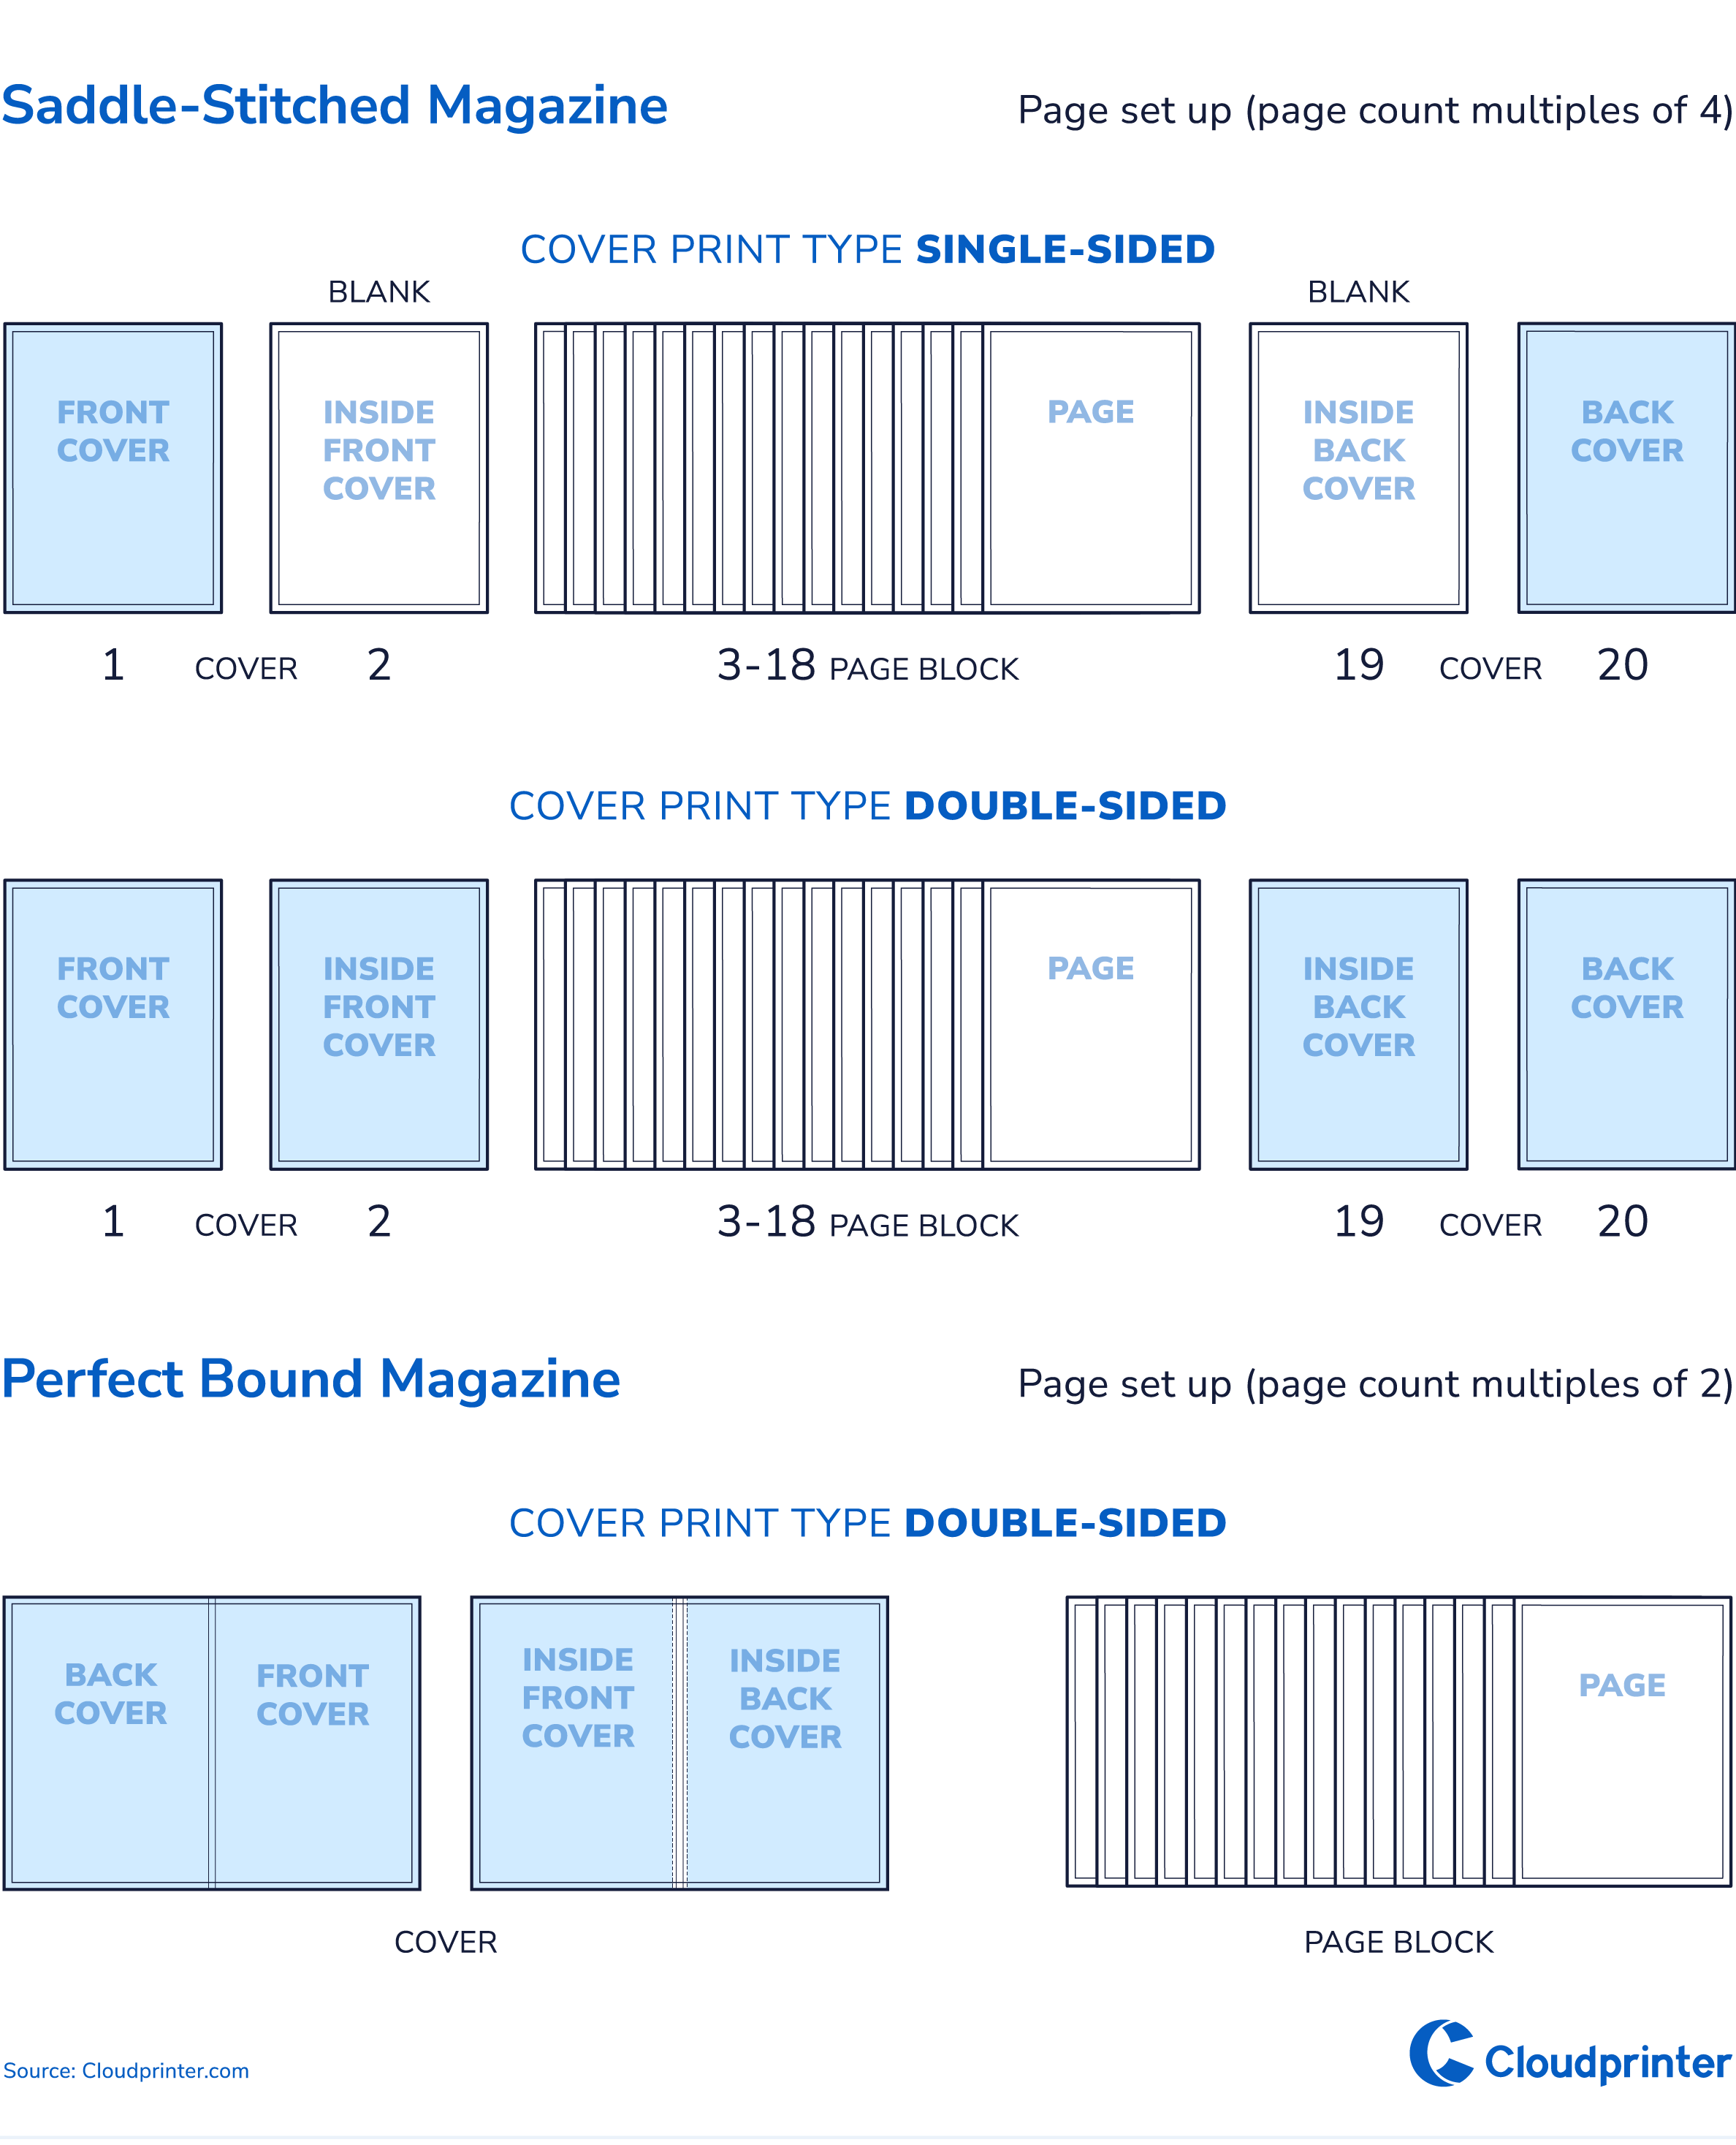
For the Perfect Bound Magazine 2 print files should be prepared: a cover and a pageblock. Mind the inside cover non-printed zone — 3 mm (0.125 in) along the spine.** It has to remain blank (no design applied) due to the perfect binding method when the pageblock has to stick to the inside cover surface, so the glue is applied in this zone along the spine.
Set Magazine bleeds The next step is setting the bleed areas at each side of your Magazine to make sure all important information is kept safe. For this, simply add 3 mm (0.125 in) at each side of the Magazine. Make sure your information is within the bleed limits; colors, background images and the layout of your Magazine design extend to the bleeds area as well, so that there are no white edges after cutting your Magazine. We also recommend avoiding placing text or important information inside of the safe zone — the 3 mm (0.125 in) inside of the cutting edge in order not to be clipped when cutting your Magazine. This way, you won't lose any data while you design your Magazine.
Prepare Magazine file for printing - Set 300 DPI resolution;
Choose CMYK or RGB colour model;
Save the file in PDF/X-4.
Well done! Now you can print your Magazine all over the world as close to the delivery destination as possible.
Magazines are printed on different types of paper, here is a useful link how to save a PDF file for printing on paper:
