How to import shipping prices?
Shipping prices and options are a key part of Cloudprinter routing. When you start as a new print service provider, you need to have the available shipping options and pricing on your dashboard.
Review your shipping options
- Login to your print partner dashboard at Cloudprinter.com
- Select Shipping - Shipping Options from the menu
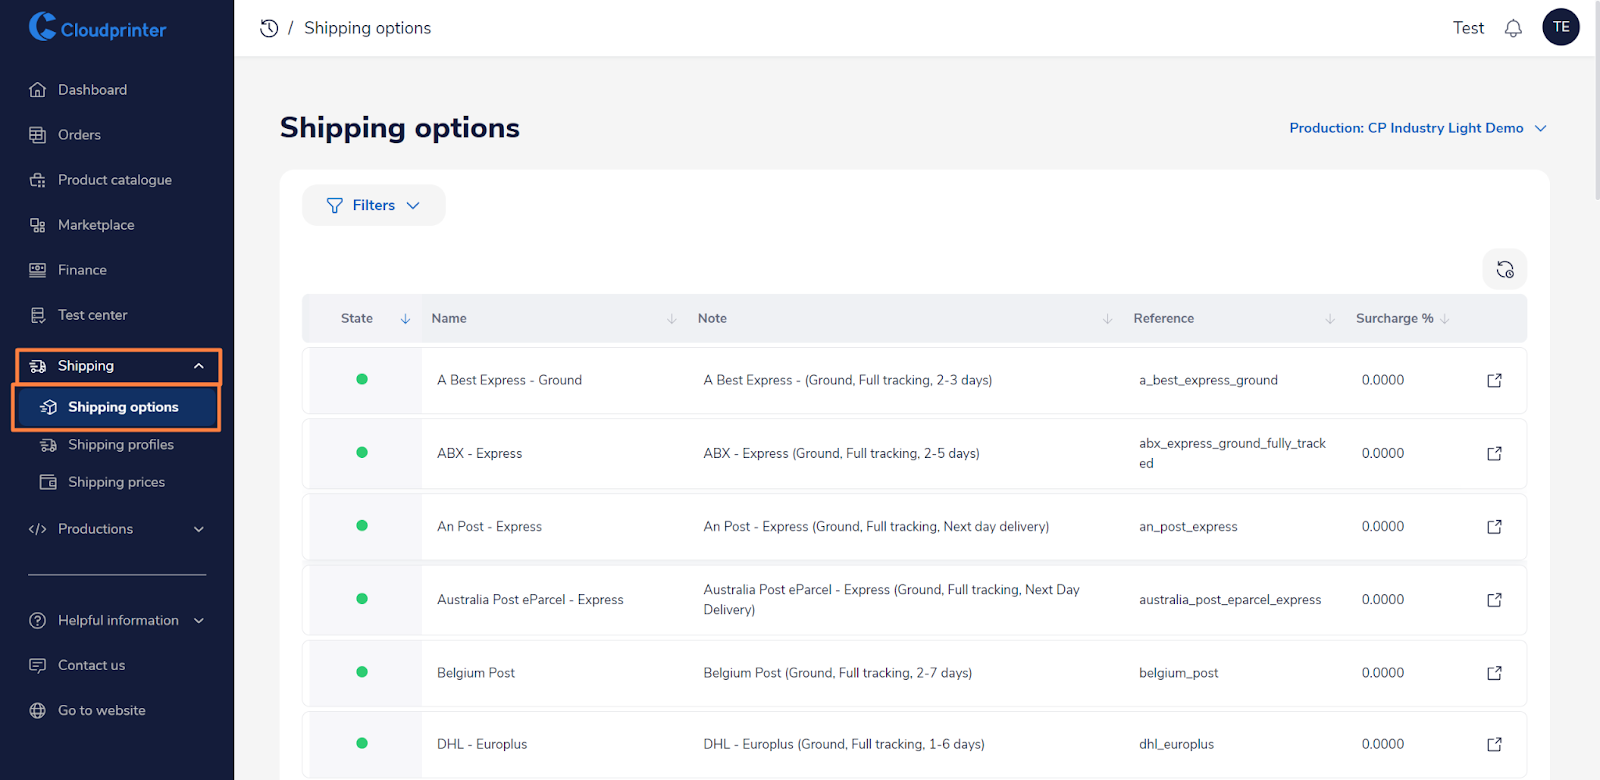
The next thing you should do is review the list and check if all the enabled shipping options are correct.
If you want to add or disable a shipping option, please contact your account manager for assistance.
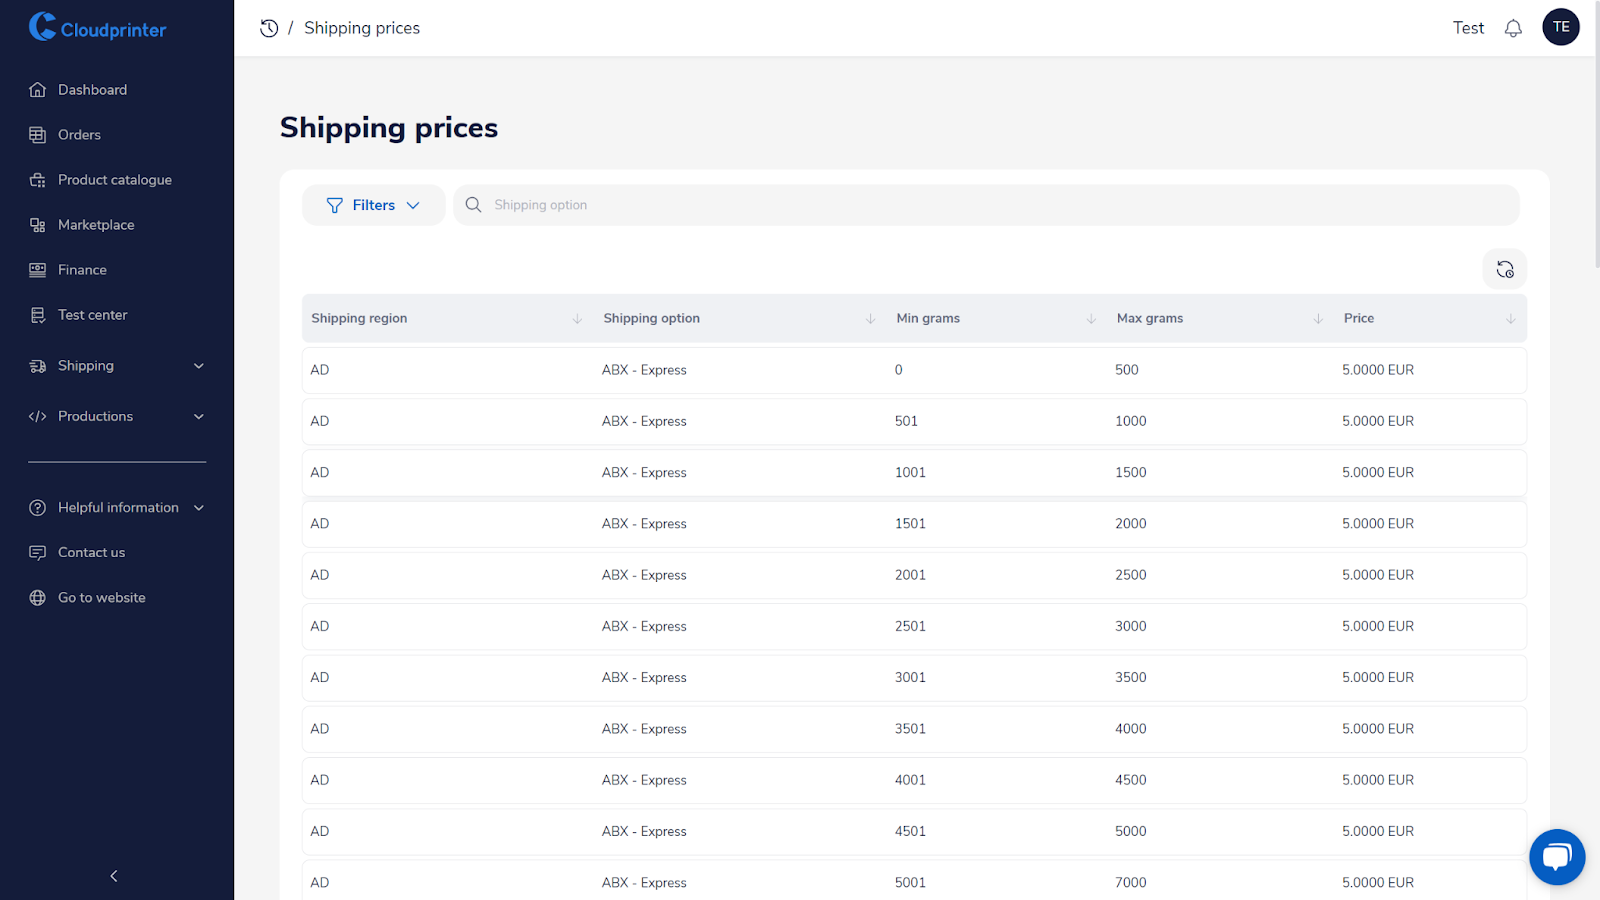
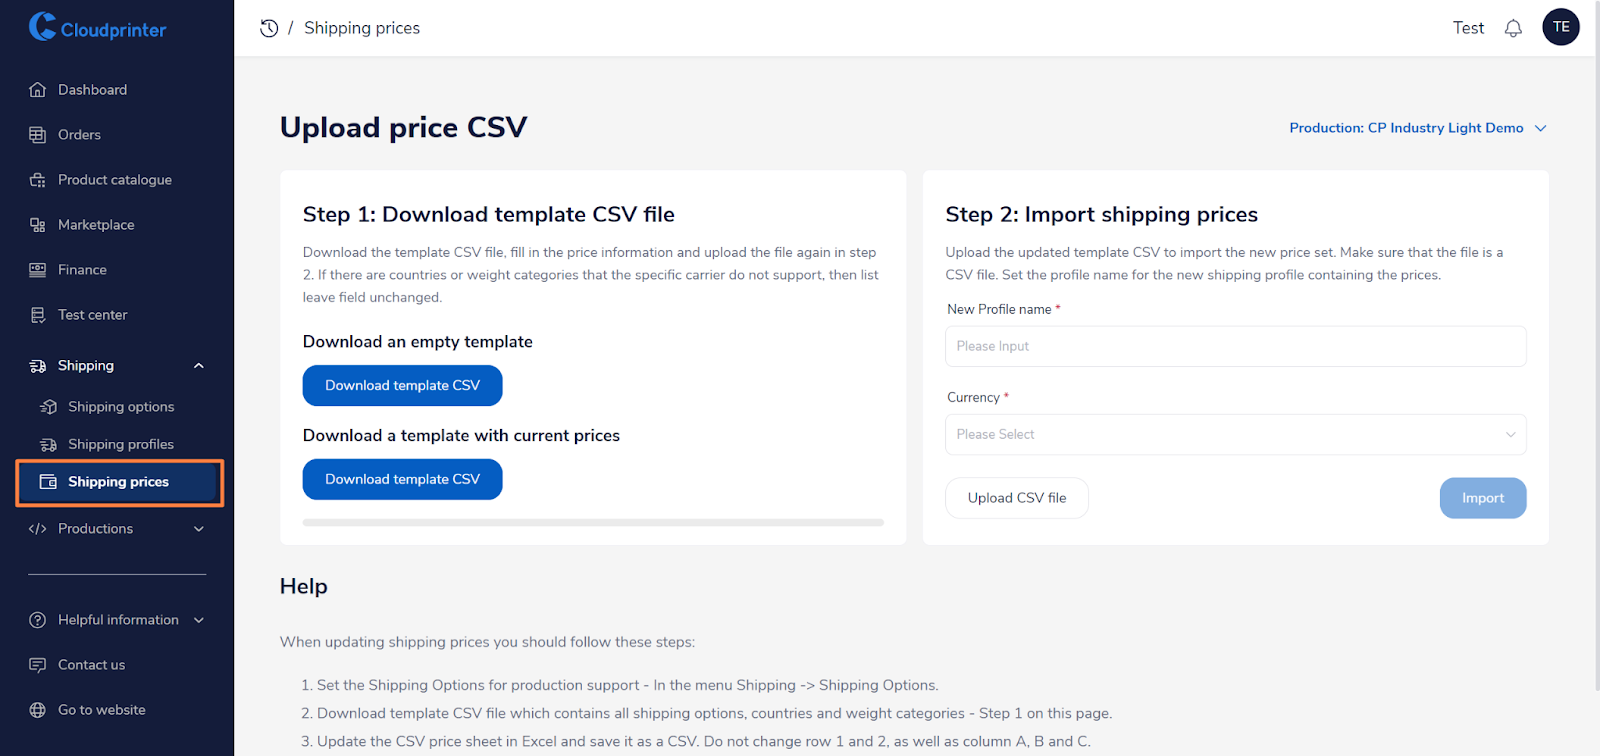
Upload shipping prices For that please click on the Shipping prices tab. Please note that shipping prices cannot be set in the dashboard and need to be uploaded as a CSV file. The CSV template we provide is generated dynamically based on the shipping options you have enabled.
- In Step 1 choose if you want to download a new blank CSV or download a file with the existing shipping prices from the currently enabled shipping profile.
- Open the CSV file in Excel.
- Set the pricing for each geographical area and weight range. Do not change rows 1 and 2, as well as columns A, B and C.
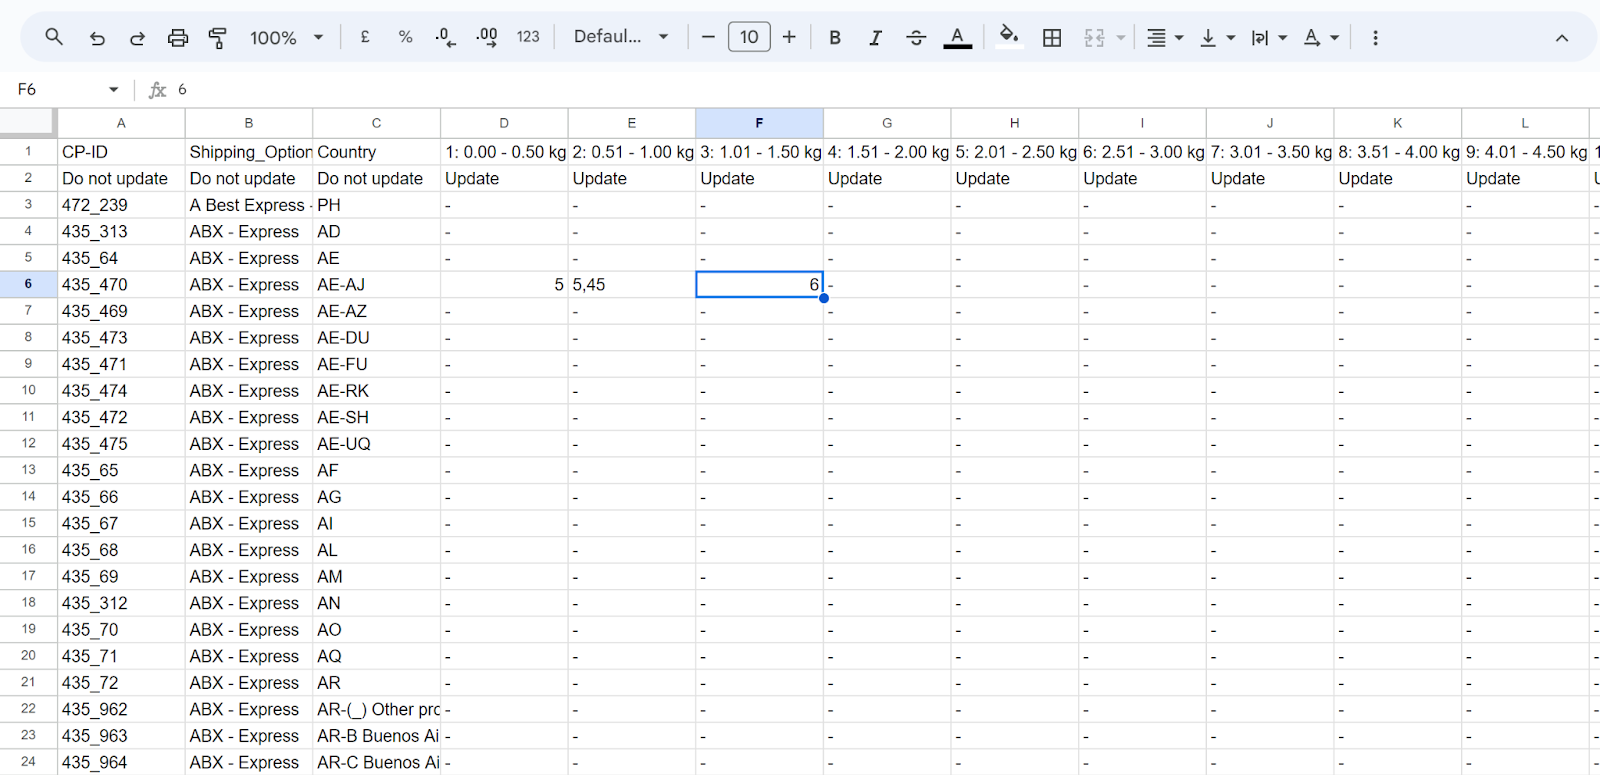
- When done, save it as a CSV file.
- Go back to the Cloudprinter dashboard and set a new profile name for the pricing you just created in the CSV file.
- Select the currency of the pricing you want to apply.
- Choose the location of the CSV file you have modified and click on "Import".
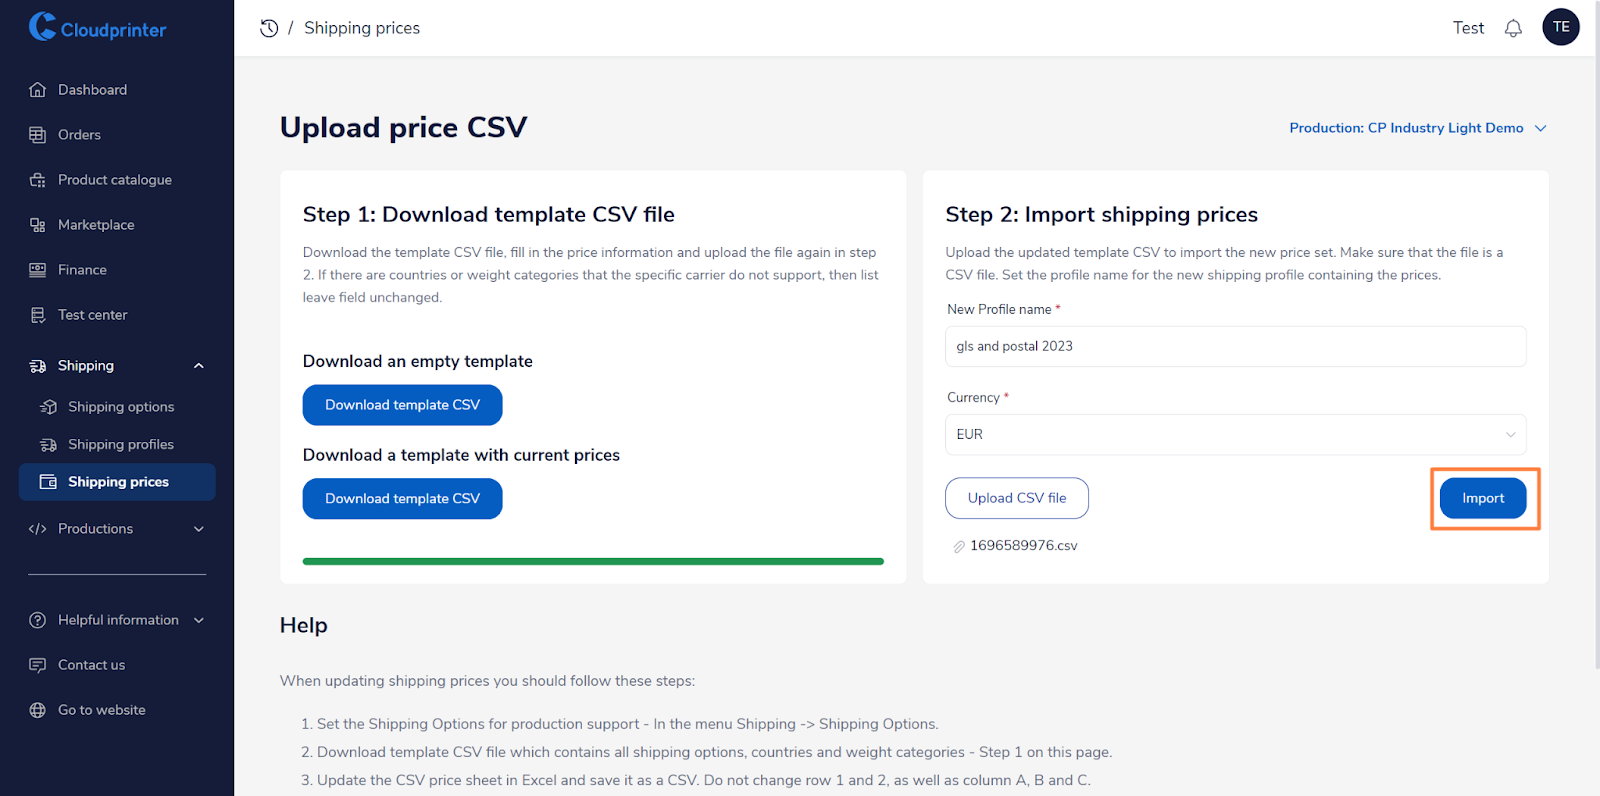
- When the import is done, please contact your account manager, so they can review the prices and activate them.
After activation, you can check if the profile was enabled in the tab Shipping profiles.
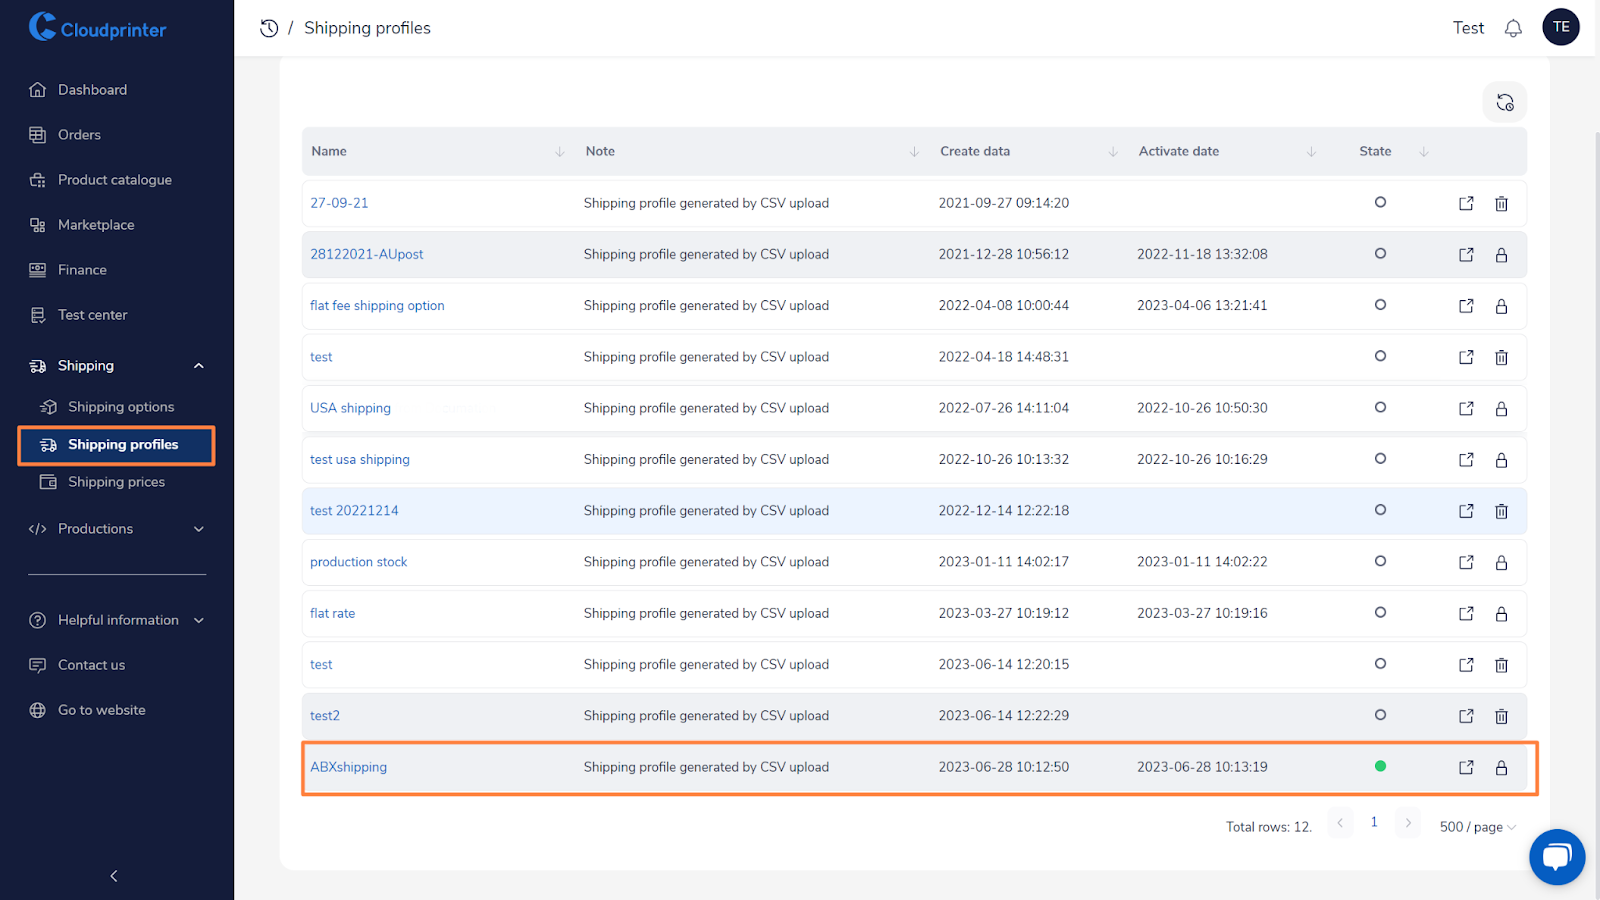
By clicking on the name of the shipping profile, you can review the prices that were set in the account.