How to set up shipping in Wix?
Step 1: Create a new shipping rates extension
To set up the extension, you need to add it to your site. It will create a new folder ecom-shipping-rates with the files for your code in the Custom Extensions section of the Velo Sidebar.
On the left side panel, press Site & App and navigate to Website.
Next, press the Edit Site button to get redirected to the editing view.
In the top menu, find Dev Mode and press Enable Developer Mode.
The left menu with icons will appear, click Public & Backend on the Velo Sidebar.
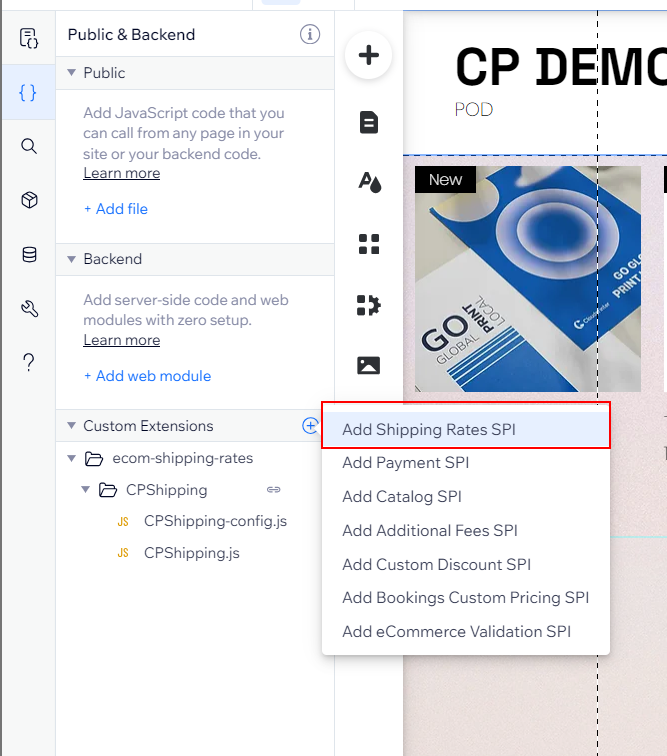
Scroll down to Custom Extensions.
In the Custom Extensions section, click on the plus button and select New Shipping Rates Extension.
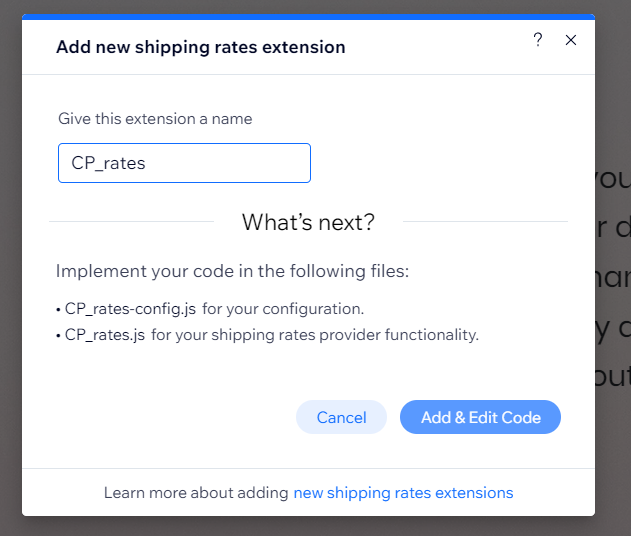
Fill in the following name CP_shipping and click Add & Edit Code.
Step 2: Implement the extension
In the new folder ecom-shipping-rates, you will find a folder with the name of the extension you set up. This folder contains two files: a *-config.js file and a .js file (for example CloudprinterShippingRates-config.js and CloudprinterShippingRates.js).
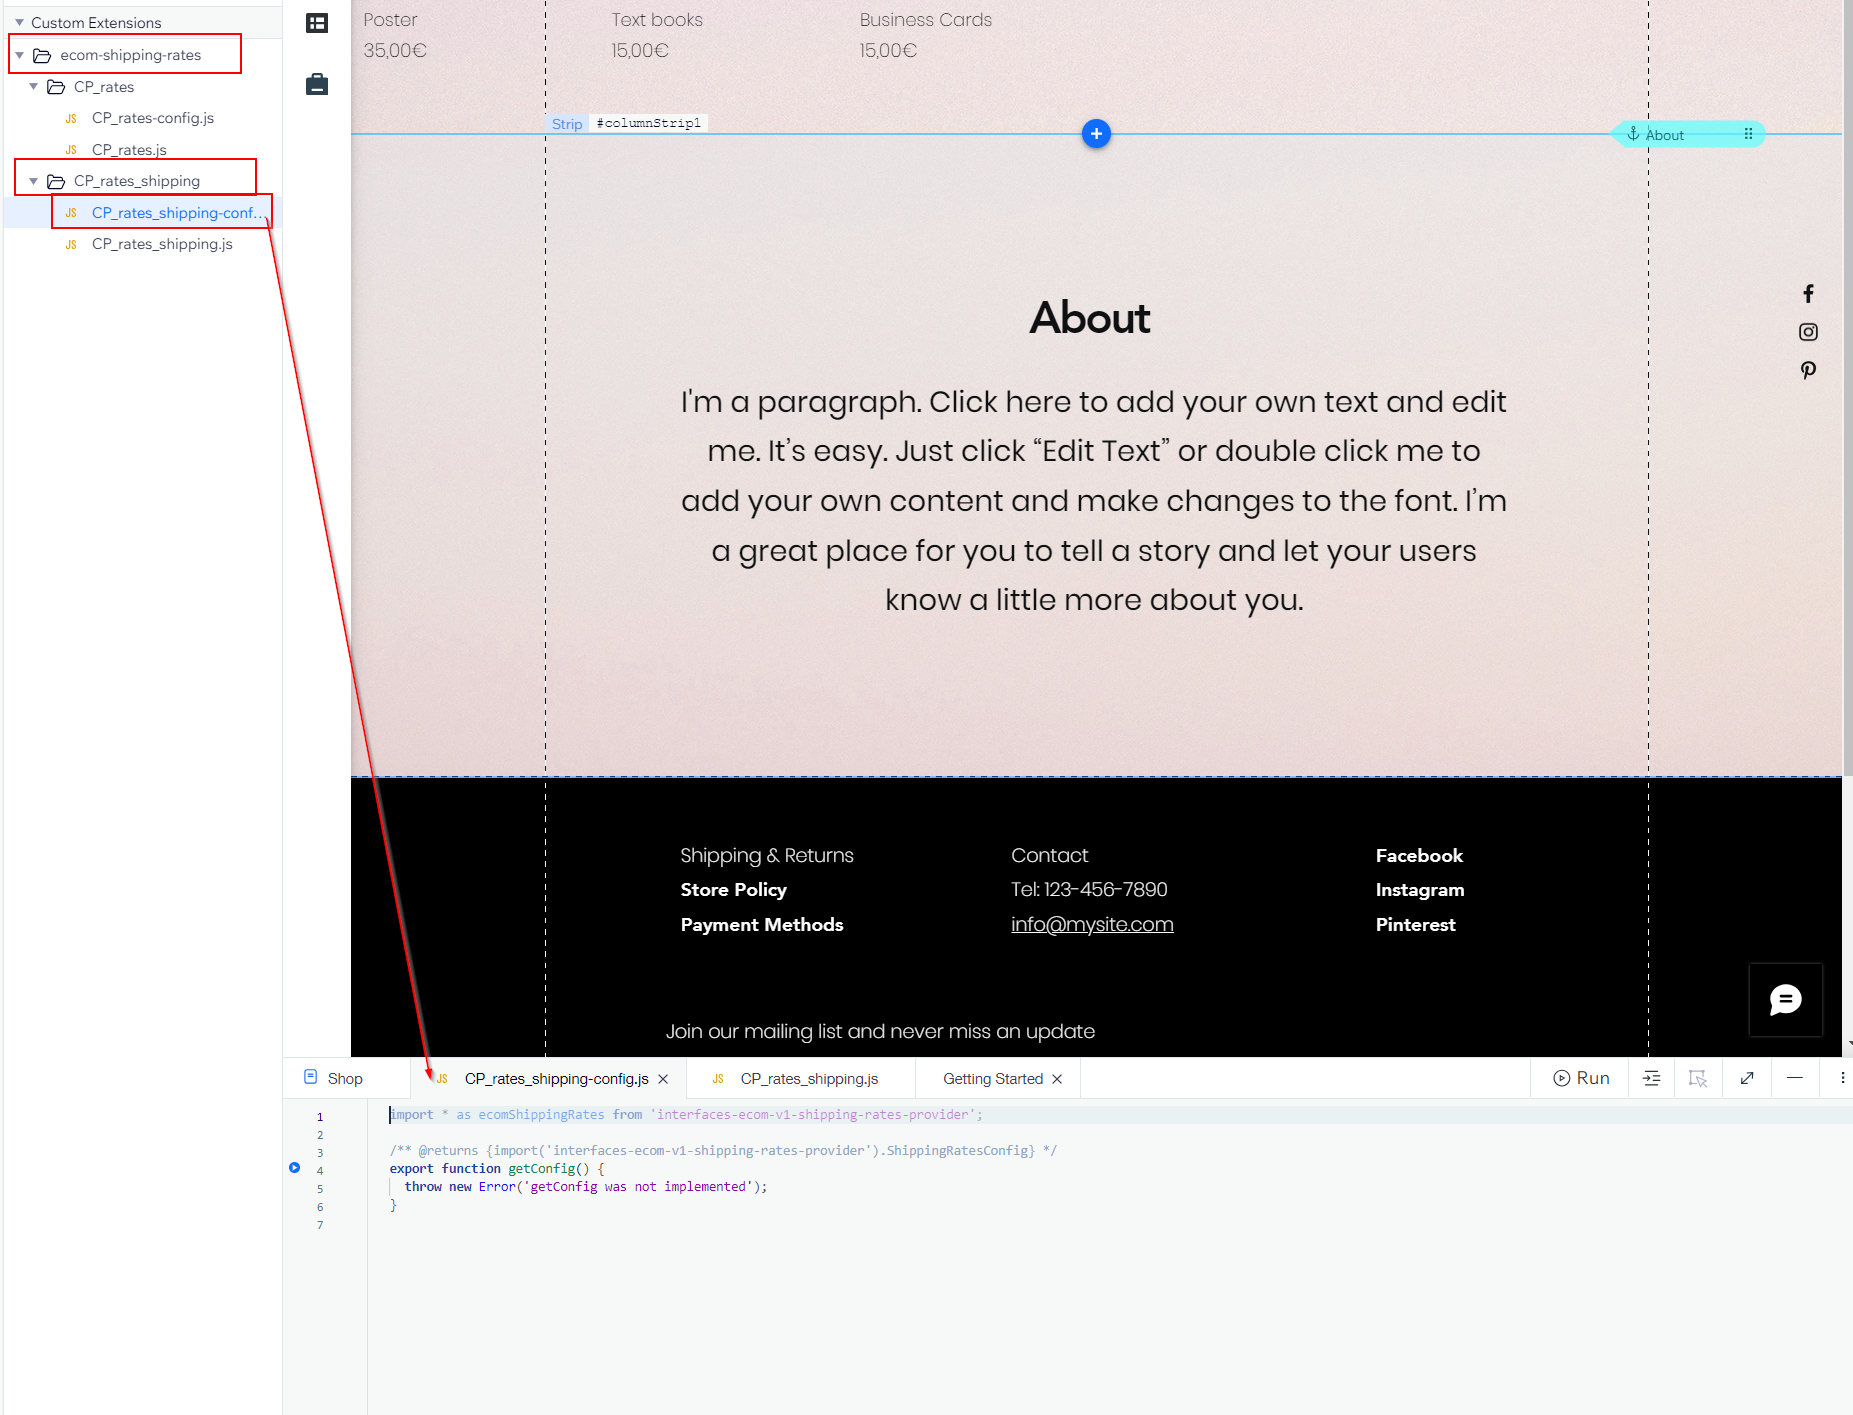
Copy the code below into the corresponding files in the Wix editor.
CloudprinterShippingRates-config.js
import * as ecomShippingRates from 'interfaces-ecom-v1-shipping-rates-provider';

/**
 * @returns {import('interfaces-ecom-v1-shipping-rates-provider').ShippingRatesConfig}
 */
export function getConfig() {
  return { name: 'MyRates' };
}CloudprinterShippingRates.js
import * as ecomShippingRates from 'interfaces-ecom-v1-shipping-rates-provider';
import { fetch } from 'wix-fetch';

/**
 * This function is automatically called by Wix eCommerce to retrieve the shipping rates provided by your extension.
 * This happens when certain actions are performed on the cart and/or checkout. For example, when an item is added to the cart.
 *
 * Shipping Rates Velo SPI reference: https://www.wix.com/velo/reference/spis/wix-ecom/ecom-shipping-rates.
 * @param {import('interfaces-ecom-v1-shipping-rates-provider').GetShippingRatesOptions} options
 * @param {import('interfaces-ecom-v1-shipping-rates-provider').Context} context
 * @returns {Promise}
 */
export const getShippingRates = async (options, context) => {
  const shippingToken = '95b0a879-b03d-4f45-94fe-e4e8843d7499';
  const apiUrl = 'https://api.cloudapps.cloudprinter.com/external/wix';
  const endPointUrl = '/1.0/client/shipping-options';
  const country = options.shippingDestination.country;
  const state = options.shippingDestination.state || '';
  const currency = context.currency;
  const lineItems = options.lineItems.map((i) => {
    return {
      quantity: i.quantity,
      price: i.price,
      name: i.name,
      catalogReference: {
        catalogItemId: i.catalogReference.catalogItemId,
        variantId: i.catalogReference.options.variantId,
      },
    };
  });
  const requestOptions = {
    method: 'POST',
    headers: {
      Accept: 'text/plain',
      'Content-Type': 'application/json',
      'x-shipping-token': shippingToken,
    },
    body: JSON.stringify({ country, state, currency, lineItems }),
  };
  const output = { shippingRates: [] };
  await fetch(apiUrl + endPointUrl, requestOptions)
    .then((response) => {
      if (response.ok) {
        return response.json();
      }
      throw new Error('Something went wrong');
    })
    .then((responseJson) => {
      output.shippingRates = responseJson;
    })
    .catch((error) => {
      console.error(error);
    });
  return output;
};Step 3: Deploy the extension
Once your code files are ready, you need to deploy your extension and enable it on your website dashboard.
- Publish your site. There may be a delay in the new shipping rates appearing on your website's dashboard.
- Go to the Shipping & Fulfilment settings on your website's dashboard.
- Select the region where you want to apply the new shipping rates. You can choose different countries at the same time.
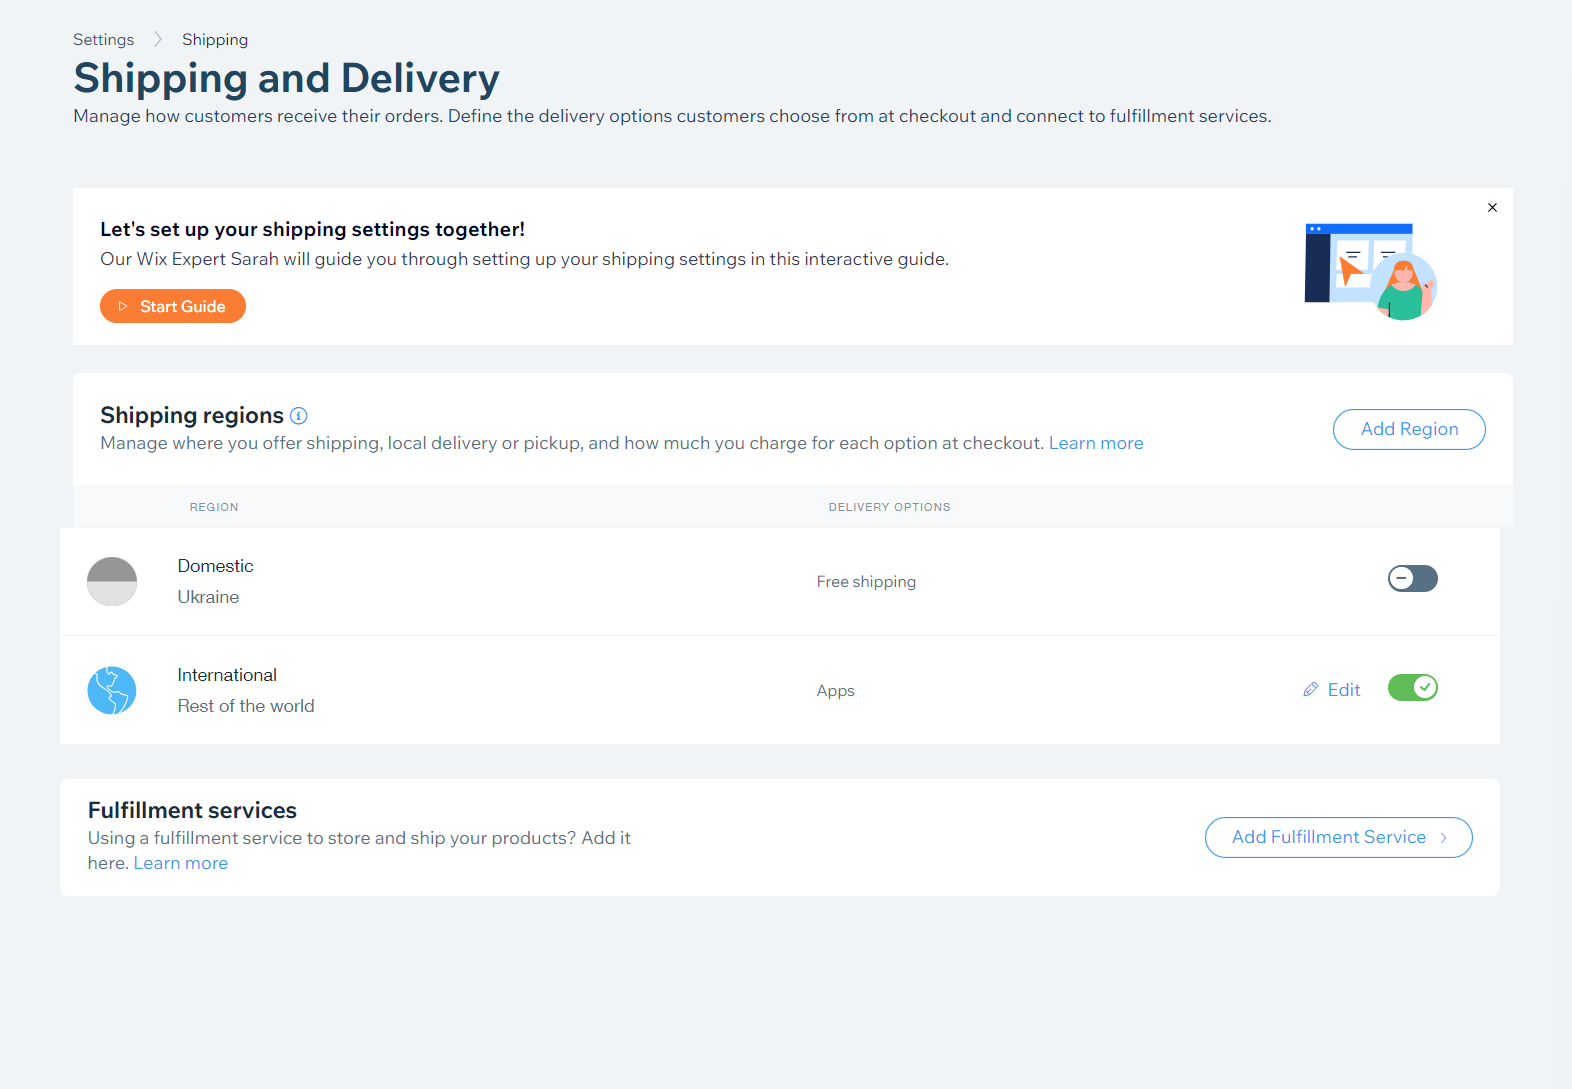
- Remove any shipping rates previously added by default, there must not be any rates there.
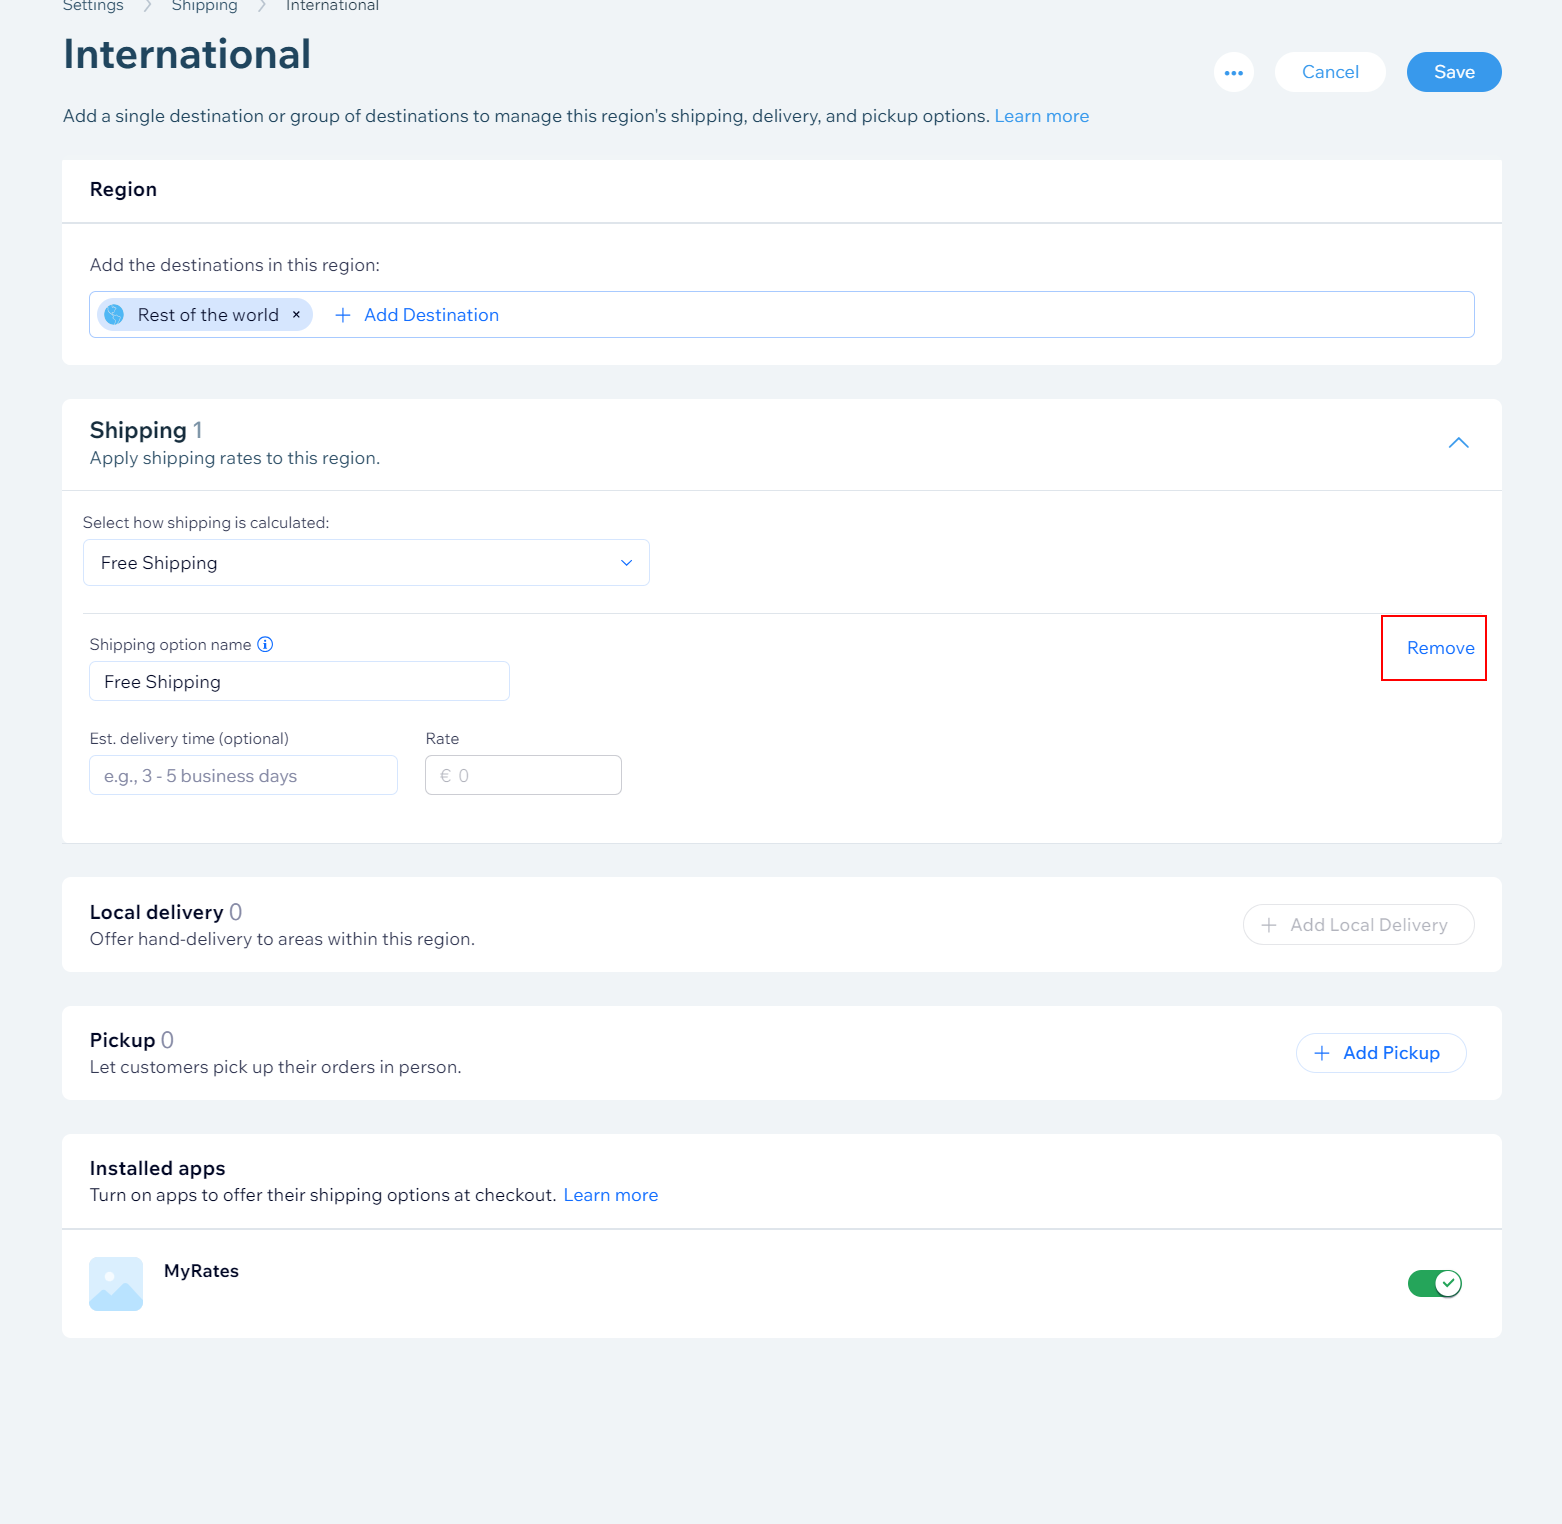
- Under Installed Apps, use the toggle to turn on the new shipping rates extension.

Click Save.
Once your custom extension is deployed, your custom shipping rates will appear on your website's Cart and Checkout pages.
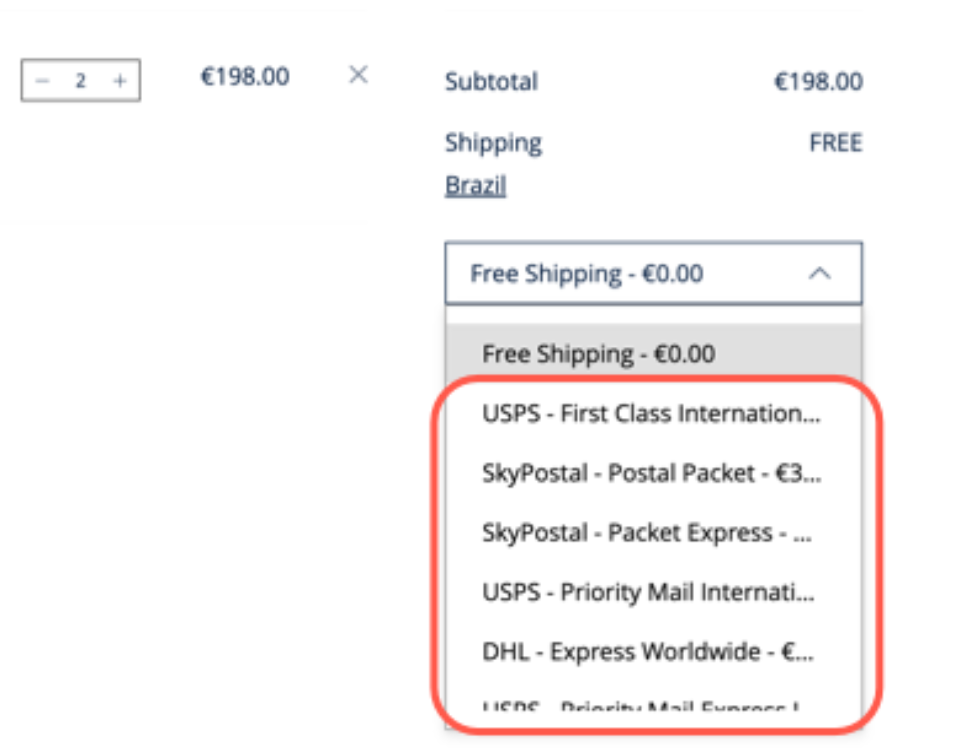
Important! Shipping currency and site currency must be the same for shipping to appear.
If your shipping options do not appear please clear cookies and refresh. It may also take extra time for the shipping to be updated.
